Introduction
Before jumping in, it’s important to know that there isn’t a “one-size-fits-all” approach to designing a gallery wall. Every gallery setup is different depending on your style, the space available, and the pieces you want to display. However, the main goal is to create visual harmony and balance while telling a story through art, photos, or memorabilia.
Each frame acts as a chapter within your larger story, adding depth and personal flair to the overall aesthetic. Whether you're working with a curated collection of personal mementos or bold, eye-catching art pieces, focusing on the right gallery wall frames will not only tie your design together but also elevate the room’s atmosphere. What’s most important is that your wall feels cohesive while maintaining that personal touch, making it truly your own.
What You’ll Need
Before you start transforming your wall, gather all the materials to make the process as smooth as possible. Here’s what you’ll need:
-
A variety of frames (try to mix and match for added texture and dimension)
-
Artwork, personal photos, or posters
-
A measuring tape
-
Painter’s tape or paper templates for practice placement
-
Hammer and nails/screws
-
A level (for accuracy)
These essential tools will ensure that you’re well-prepared, making the setup quick and organized. Whether you’re framing family photos, travel images, or canvas art, be sure everything is within reach before you start working on your layout.
Step-by-Step Guide to Creating Your Gallery Wall
1. Pick the perfect wall space
The first step is deciding which wall you want to transform into a gallery showcase. This could be an accent wall in your living room, a hallway, above your bed’s headboard, or even an office space. Ideally, choose a wall with enough open room to allow your gallery wall frames to shine without the area looking too cluttered.
2. Choose a theme or style for your frames
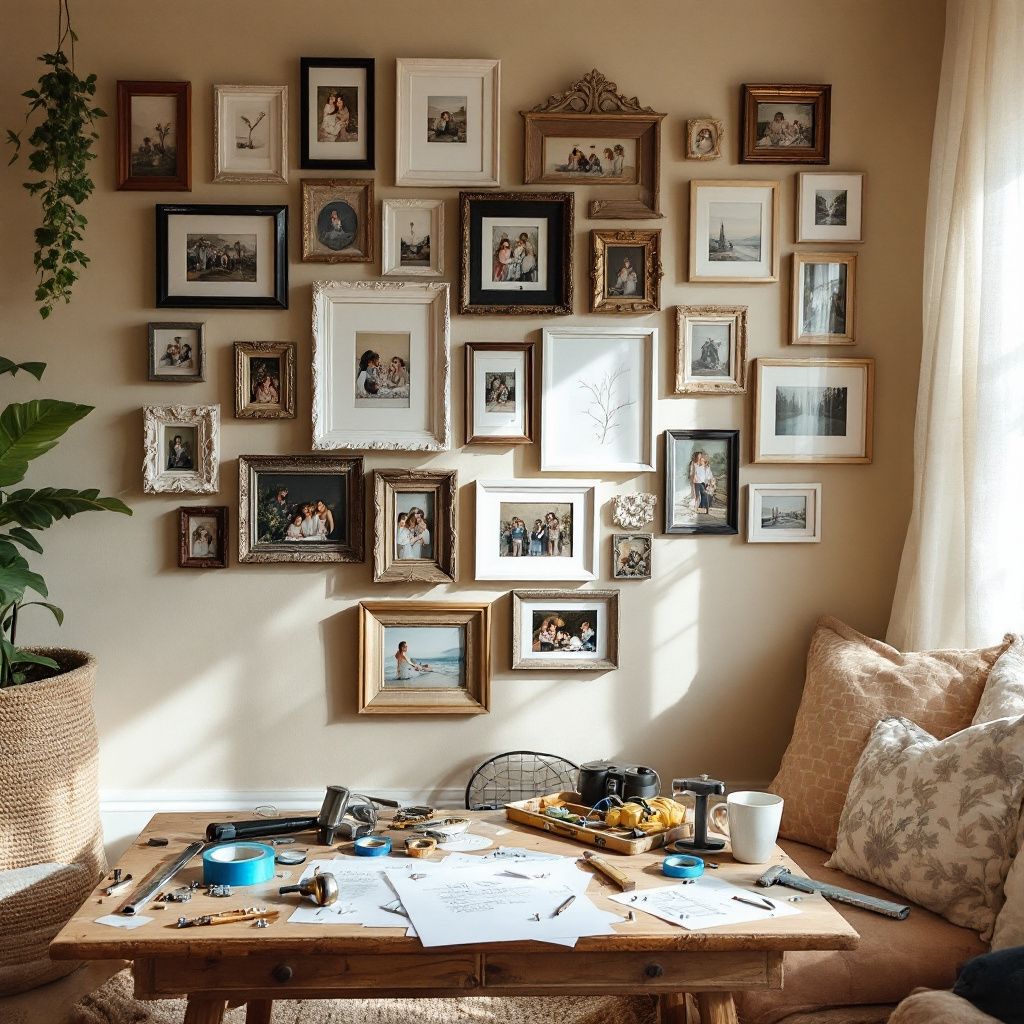
When it comes to gallery wall frames, consistency matters. Constantly changing frame designs or colors can create a chaotic appearance. Choose a theme that appeals to you, whether that’s sleek, minimalist frames or ornate, vintage ones. Mix and match frames, but ensure that there’s some continuity between them through color, texture, or material.
Also, consider the items you want to display. Personal photos, abstract art, posters, or even text-based prints can all fit within the gallery wall aesthetic.
3. Decide how to lay out your gallery wall frames
Mapping out your frames before hammering the nails is key. Start by laying the frames on the floor, trying different arrangements. This step allows flexibility and prevents unnecessary holes in your walls. Don’t worry too much about making the display symmetrical (unless that’s the style you’re going for). Sometimes a deliberately asymmetrical design can look even better.
Helpful Tips for Layout:
- Grid Format: Best for identical or similarly sized frames. Creates a very orderly, structured look.
- Freeform / Organic Layout: Works well with a variety of frame shapes and sizes. It’s more relaxed and can grow over time.
- Linear Arrangement: Frames are aligned horizontally or vertically in straight lines. Ideal for long hallways.
4. Prepare your wall
This step is simple but crucial. Use painter’s tape and paper templates to mock up where your frames will go. Painter’s tape won’t damage paint and will help you visualize the layout on the actual wall. Stand back, take a moment, and make adjustments where needed.
By using these placeholders, you ensure fewer mistakes once the nails come out. Don’t forget to use a level at this stage to make sure everything is straight!
5. Get Framing!
Whether you’re using framed photos, canvas, or posters, now’s the time to get them ready. Here’s where we might be able to simplify things for you. At Text To Frame It, you can easily send us a photo via text, and we'll handle printing and framing for you. You choose your product, and voila—your gallery wall frames are ready. You can check out our service here!
6. Hanging your frames
Once you have your layout mocked on the wall, it’s time to make things permanent.
Additional Tips for Perfecting Your Gallery Setup
-
Add Dimension – Layer in some 3D elements. Include small shelves, plants, or shadowboxes between your gallery wall frames to create depth and interest. This adds added layers to the visual landscape, giving your gallery a dynamic and engaging quality.
-
Varied Art Mats – You can up the visual interest by playing with different mat sizes (the area between the art and the frame). Some prints might look better with larger mats, while others should have minimal space between the piece and the frame. This seemingly small tweak can significantly impact the overall aesthetic of your wall.
-
Personal touch – If it’s a home gallery wall, opt for personal moments such as family trips, favorite pets, or places you’ve visited. Themes like family photo frames instantly add warmth and personal significance. Don’t be afraid to switch things up now and again. A gallery wall isn't fixed; it evolves over time, just like the memories and moments you’re displaying.
Styles and Ideas for Different Rooms
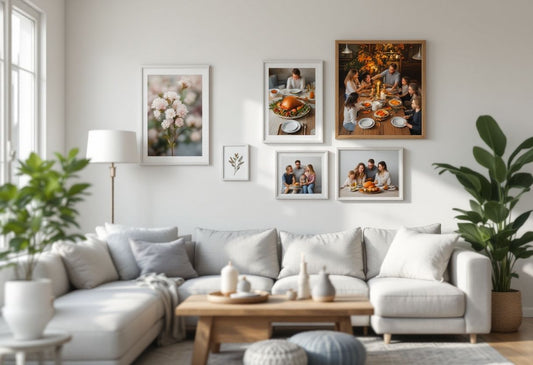
Living Room
A living room gallery wall is often designed to capture attention. Opt for a mix of family portraits, travel photos, or abstract art. The key here is making it a focal point of the space without overwhelming it. Since the living room tends to be the hub of the home, your gallery wall frames should feel welcoming. Consider adding framed memories of family gatherings or incorporating an eclectic blend of prints and photographs. Make sure the arrangement flows with the decor of the room so it all feels cohesive rather than cluttered.
Hallways
Hallways are great for more structured gallery setups or a long linear layout. Since hallways are typically narrow, keeping your gallery wall frames streamlined helps create a clean, cohesive look. Consider using frames of similar sizes and colors for an uncluttered aesthetic—this is where a grid format could shine. If your hallway sees a lot of foot traffic, ensure that your frames are securely mounted and evenly spaced to avoid any visual disruptions.
Home Office
In a home office, opt for pieces that inspire creativity and focus. Professional or motivational photos, architectural images, or even bold typographic prints can help keep inspiration at arm’s length. The gallery wall frames in this space should be clean and avoid overwhelming designs. Simple, framed quotes or peaceful natural landscapes could also foster a calm but productive atmosphere. Avoid chaotic arrangements here—order and precision in the frame layout go a long way in maintaining focus.
Bedroom
The best gallery setups in bedrooms invoke a sense of peace and serenity. Think soft colors or personal, intimate moments. Opting for lighter frame designs and using minimalist artwork can turn your bedroom into a calming retreat. Artwork with neutral tones or even black-and-white photography can help set a relaxing atmosphere. Here, less is often more, so keep the arrangement simple and soothing—perfect for a peaceful space where you unwind.
Conclusion
Building a gallery wall is a creative and exciting project that anyone can accomplish with some planning and attention to detail. Whether you’re using gallery wall frames to display family memories, important milestones, or bold artistic statements, there’s no wrong way to go about it. Your gallery wall reflects your personal style and tells your story.
By following our easy-to-follow steps and keeping a few pro tips in mind, you’ll create a wall of memories or art that you’ll love to look at every day. And if you need some help getting your frames ready, remember we’re at Text To Frame It ready to assist you.
Happy framing!